如何測試組件互動
學習如何模擬使用者行為並執行功能檢查

你撥動開關,燈卻沒有亮。可能是燈泡燒壞了,也可能是電線故障。開關和燈泡透過牆壁內的電線連接在一起。
應用程式也是如此。表面上是使用者看到和互動的 UI。在底層,UI 連接著各種線路,以促進資料和事件的流動。
隨著你建構更複雜的 UI(例如頁面),組件的職責不僅僅是渲染 UI。它們還會獲取資料和管理狀態。本文將逐步介紹互動式組件的測試。你將學習如何使用電腦來模擬和驗證使用者互動。
那個組件真的能正常運作嗎?
組件的主要任務是根據一組 props 渲染 UI 的一部分。更複雜的組件還會追蹤應用程式狀態,並將行為向下傳遞到組件樹中。
例如,組件將從初始狀態開始。當使用者在輸入欄位中輸入內容或點擊按鈕時,它會在應用程式內觸發一個事件。組件會響應此事件來更新狀態。然後,這些狀態變更會更新渲染的 UI。這就是互動的完整週期。
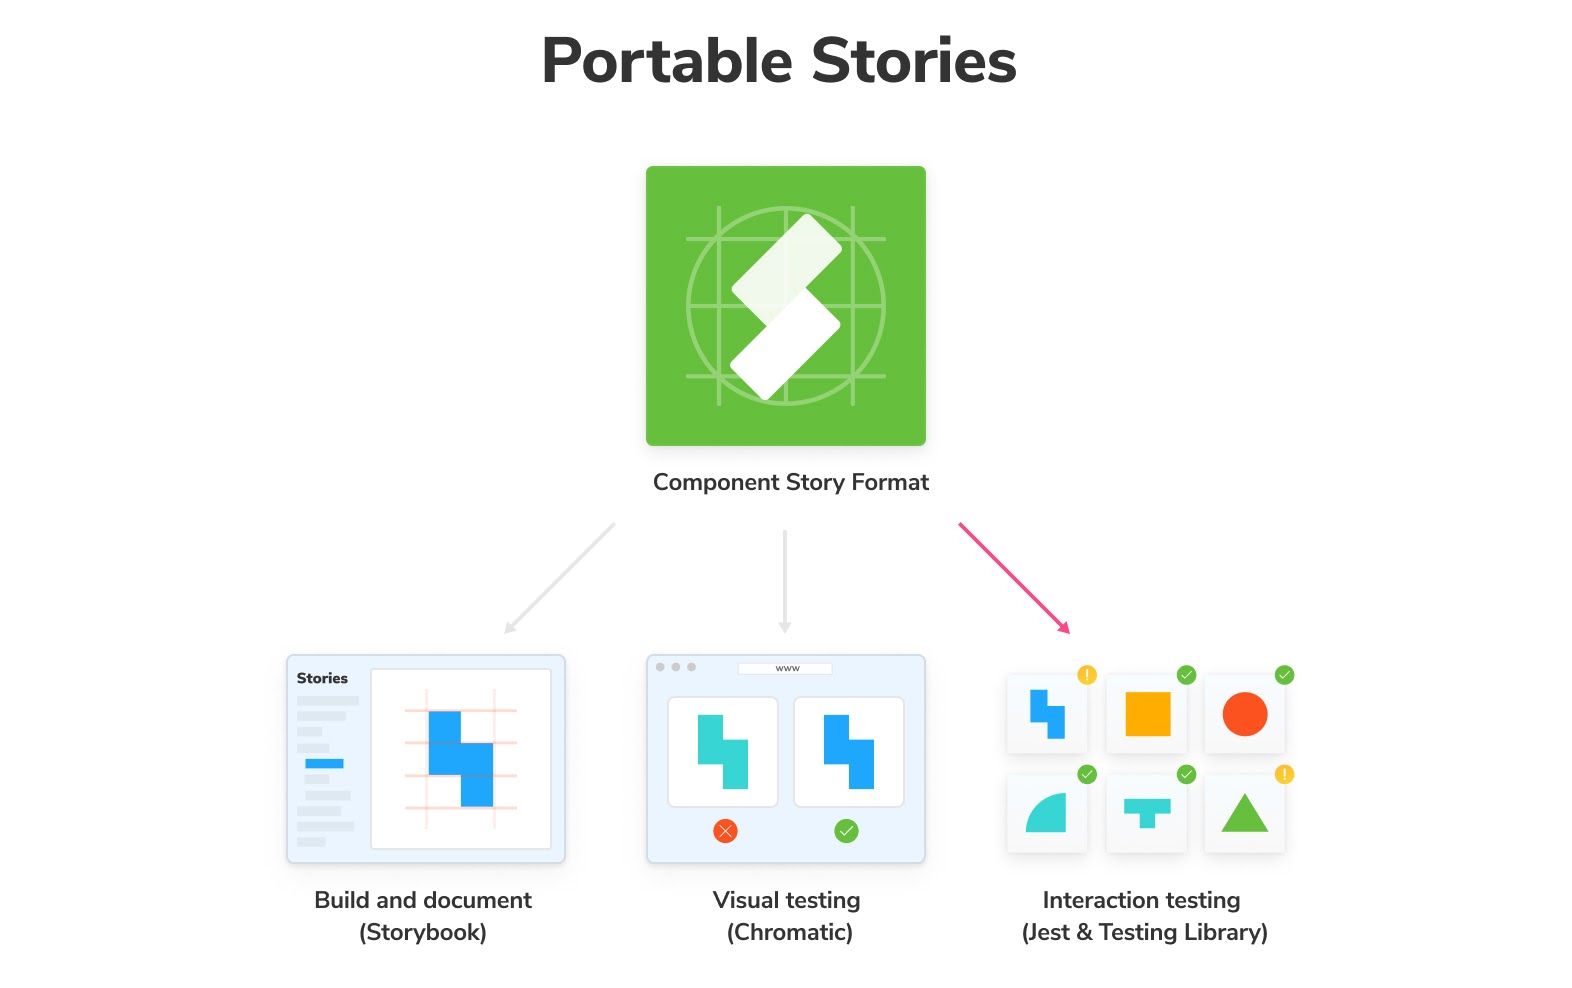
考慮一下我在先前的文章中介紹的 Taskbox 應用程式。在 InboxScreen 上,使用者可以點擊星號圖示來釘選任務。或點擊核取方塊來封存它。視覺化測試確保組件在所有這些狀態下看起來都正確。我們還需要確保 UI 能夠正確響應這些互動。
以下是互動測試工作流程的外觀
- 📝 設定: 隔離組件並為初始狀態提供適當的 props。
- 🤖 動作: 渲染組件並模擬互動。
- ✅ 執行斷言 以驗證狀態是否已正確更新。
Taskbox 應用程式是使用 Create React App 引導啟動的,它預先配置了 Jest。這就是我們將用來編寫和執行測試的工具。
測試組件的功能,而不是其運作方式
就像單元測試一樣,我們希望避免測試組件的內部運作方式。這會使測試變得脆弱,因為無論輸出是否變更,只要你重構程式碼,它就會破壞測試。這反過來會減慢你的速度。
這就是為什麼 Adobe、Twilio、Gatsby 和更多團隊使用 Testing-Library 的原因。它允許你評估渲染的輸出。它的運作方式是在虛擬瀏覽器 (JSDOM) 中掛載組件,並提供複製使用者互動的實用程式。
我們可以編寫模擬真實世界使用情況的測試,而不是存取組件的內部狀態和方法。從使用者的角度編寫測試,讓我們更有信心我們的程式碼能夠正常運作。
讓我們深入研究一些程式碼,看看這個過程是如何運作的。我們這次的起點是 composition-testing 分支。
重複使用 stories 作為互動測試案例
我們先編寫一個測試案例。先前,我們在 InboxScreen.stories.js 檔案中編目了 InboxScreen 組件的所有用例。這讓我們能夠在開發期間進行外觀檢查,並透過視覺化測試來捕捉回歸錯誤。這些 stories 現在也將為我們的互動測試提供支援。
// InboxScreen.stories.js
import React from 'react';
import { rest } from 'msw';
import { InboxScreen } from './InboxScreen';
import { Default as TaskListDefault } from './components/TaskList.stories';

export default {
 component: InboxScreen,
 title: 'InboxScreen',
};

const Template = (args) => <InboxScreen {...args} />;

export const Default = Template.bind({});
Default.parameters = {
 msw: [
   rest.get('/tasks', (req, res, ctx) => {
     return res(ctx.json(TaskListDefault.args));
   }),
 ],
};

export const Error = Template.bind({});
Error.args = {
 error: 'Something',
};
Error.parameters = {
 msw: [
   rest.get('/tasks', (req, res, ctx) => {
     return res(ctx.json([]));
   }),
 ],
};
Stories 是以基於標準 JavaScript 模組的可移植格式編寫的。你可以將它們與任何基於 JavaScript 的測試函式庫(Jest、Testing Lib、Playwright)重複使用。這讓你無需為套件中的每個測試工具設定和維護測試案例。例如,Adobe Spectrum 設計系統團隊使用這種模式來測試互動,適用於他們的選單和對話方塊組件。
當你將測試案例編寫為 stories 時,任何形式的斷言都可以疊加在頂部。讓我們試試看。建立 InboxScreen.test.js 檔案並編寫第一個測試。與上面的範例一樣,我們正在將一個 story 匯入到這個測試中,並使用 Testing-Library 中的 render 函數來掛載它。
it 區塊描述了我們的測試。我們首先渲染組件,等待它獲取資料,找到特定的任務,然後點擊釘選按鈕。斷言檢查釘選狀態是否已更新。最後,afterEach 區塊會清理在測試期間掛載的 React 樹。
// InboxScreen.test.js
import React from 'react';
import '@testing-library/jest-dom/extend-expect';
import { render, waitFor, cleanup } from '@testing-library/react';
import * as stories from './InboxScreen.stories';

describe('InboxScreen', () => {
 afterEach(() => {
   cleanup();
 });

 const { Default } = stories;

 it('should pin a task', async () => {
   const { queryByText, getByRole } = render(<Default />);

   await waitFor(() => {
     expect(queryByText('You have no tasks')).not.toBeInTheDocument();
   });

   const getTask = () => getByRole('listitem', { name: 'Export logo' });

   const pinButton = within(getTask()).getByRole('button', { name: 'pin' });

   fireEvent.click(pinButton);

   const unpinButton = within(getTask()).getByRole('button', {
     name: 'unpin',
   });

   expect(unpinButton).toBeInTheDocument();
 });
});
執行 yarn test 以啟動 Jest。你會注意到測試失敗了。
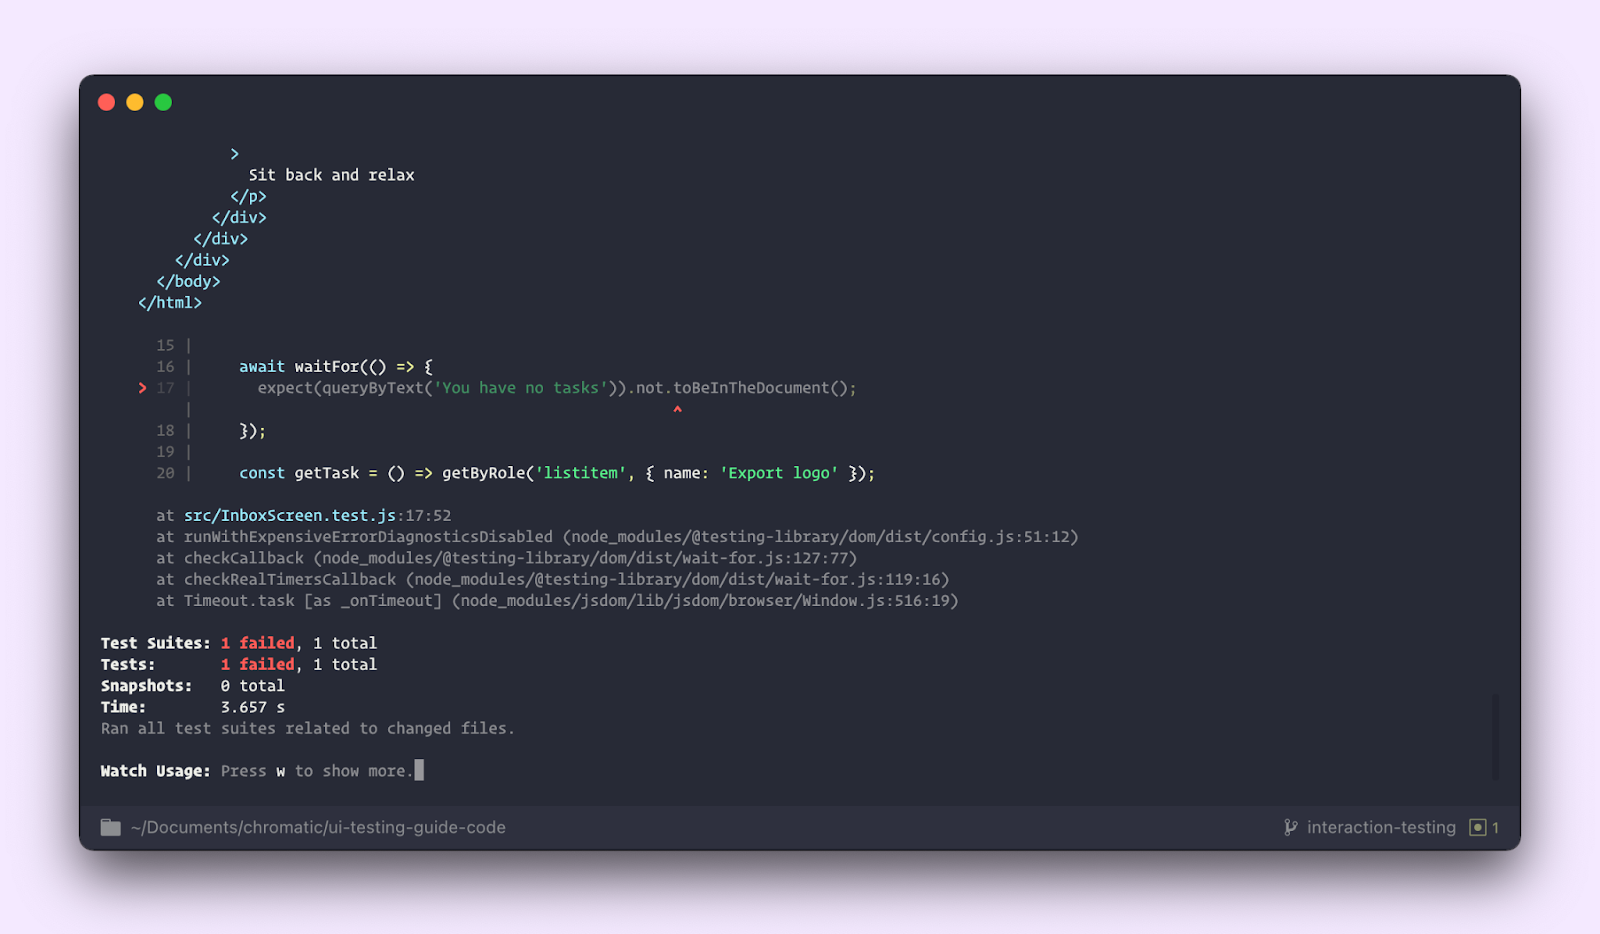
InboxScreen 從後端獲取資料。在先前的文章中,我們設定了 Storybook MSW 擴充套件 來模擬這個 API 請求。但是,這在 Jest 中不可用。我們需要一種方法來引入這個和其他組件依賴項。
組件配置開始
複雜的組件依賴於外部依賴項,例如主題提供器和上下文,以共享全域資料。Storybook 使用裝飾器來包裝 story 並提供此類功能。為了匯入 stories 以及它們的所有配置,我們將使用 @storybook/testing-react 函式庫。
這通常是一個兩步驟的過程。首先,我們需要註冊所有全域裝飾器。在我們的案例中,我們有兩個:一個提供 Chakra UI 主題的裝飾器和一個用於 MSW 擴充套件的裝飾器。我們先前在 .storybook/preview 中配置了這些。
Jest 提供了一個全域設定檔 setupTests.js,當專案引導啟動時,由 CRA 自動產生。更新該檔案以註冊 Storybook 的全域配置。
// setupTests.js
import '@testing-library/jest-dom';
import { setGlobalConfig } from '@storybook/testing-react';
import * as globalStorybookConfig from '../.storybook/preview';
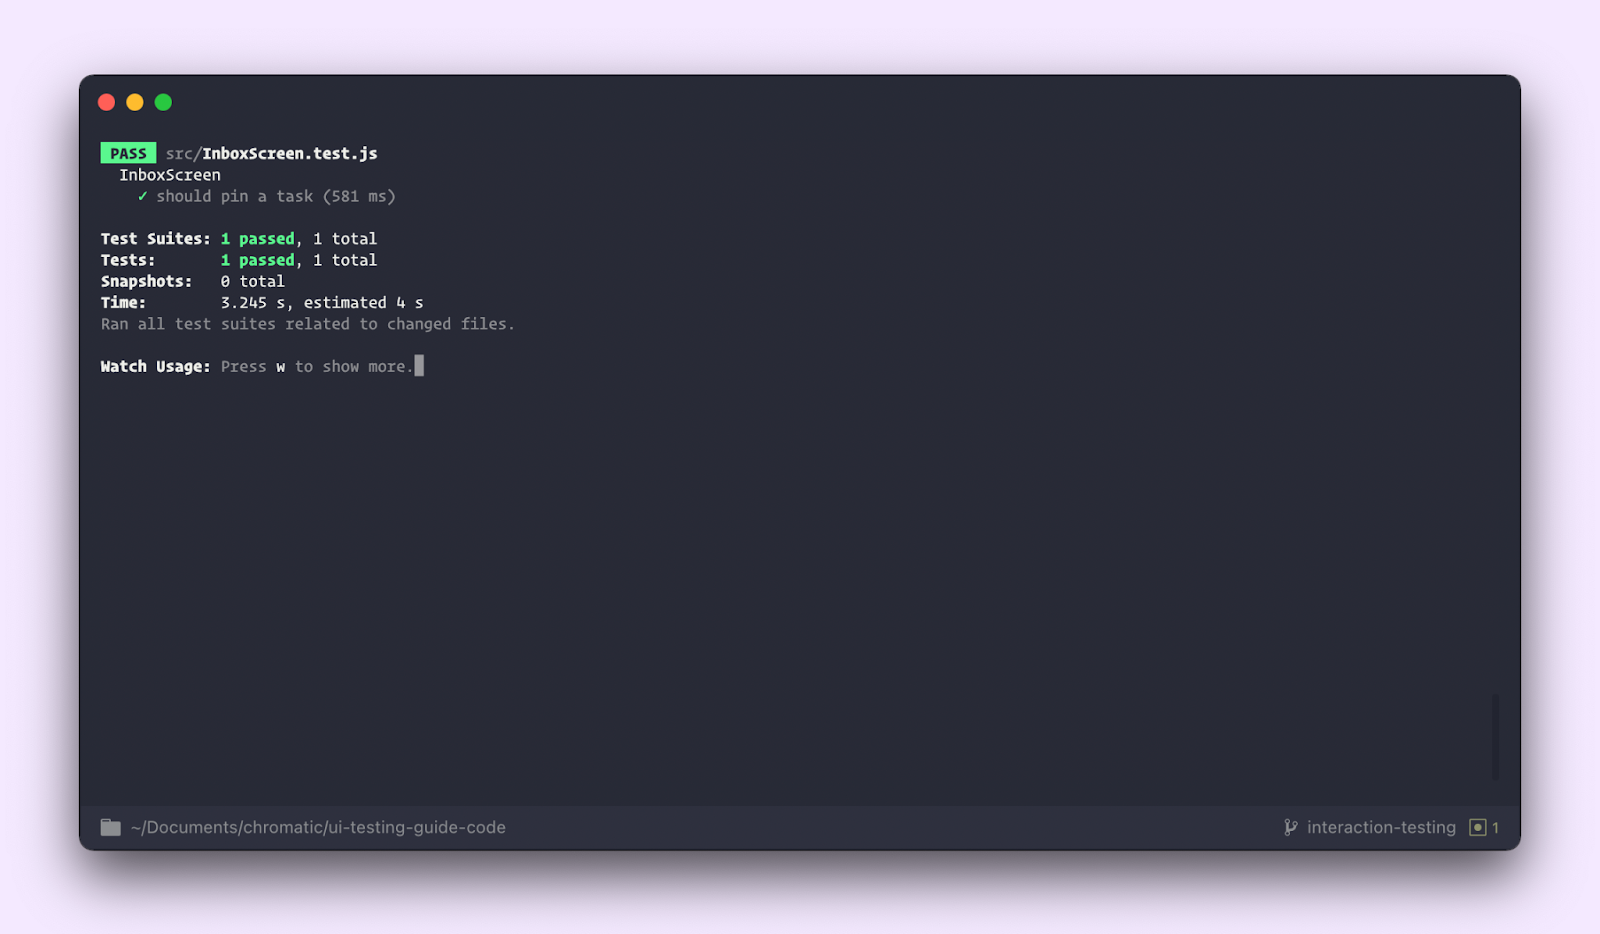
setGlobalConfig(globalStorybookConfig);接下來,更新測試以使用 @storybook/testing-react 中的 composeStories 實用程式。它傳回 stories 的 1:1 對應,所有裝飾器都已應用於它們。瞧,我們的測試通過了!
// InboxScreen.test.js
import React from 'react';
import '@testing-library/jest-dom/extend-expect';
import { render, waitFor, cleanup } from '@testing-library/react';
import { composeStories } from '@storybook/testing-react';
import { getWorker } from 'msw-storybook-addon';
import * as stories from './InboxScreen.stories';

describe('InboxScreen', () => {
 afterEach(() => {
   cleanup();
 });

 // Clean up after all tests are done, preventing this
 // interception layer from affecting irrelevant tests
 afterAll(() => getWorker().close());

 const { Default } = composeStories(stories);

 it('should pin a task', async () => {
   const { queryByText, getByRole } = render(<Default />);

   await waitFor(() => {
     expect(queryByText('You have no tasks')).not.toBeInTheDocument();
   });

   const getTask = () => getByRole('listitem', { name: 'Export logo' });

   const pinButton = within(getTask()).getByRole('button', { name: 'pin' });

   fireEvent.click(pinButton);

   const unpinButton = within(getTask()).getByRole('button', {
     name: 'unpin',
   });

   expect(unpinButton).toBeInTheDocument();
 });
});
我們已成功編寫了一個測試,該測試載入了一個 story 並使用 Testing Library 渲染它。然後,它應用模擬的使用者行為,並檢查組件狀態是否已準確更新。
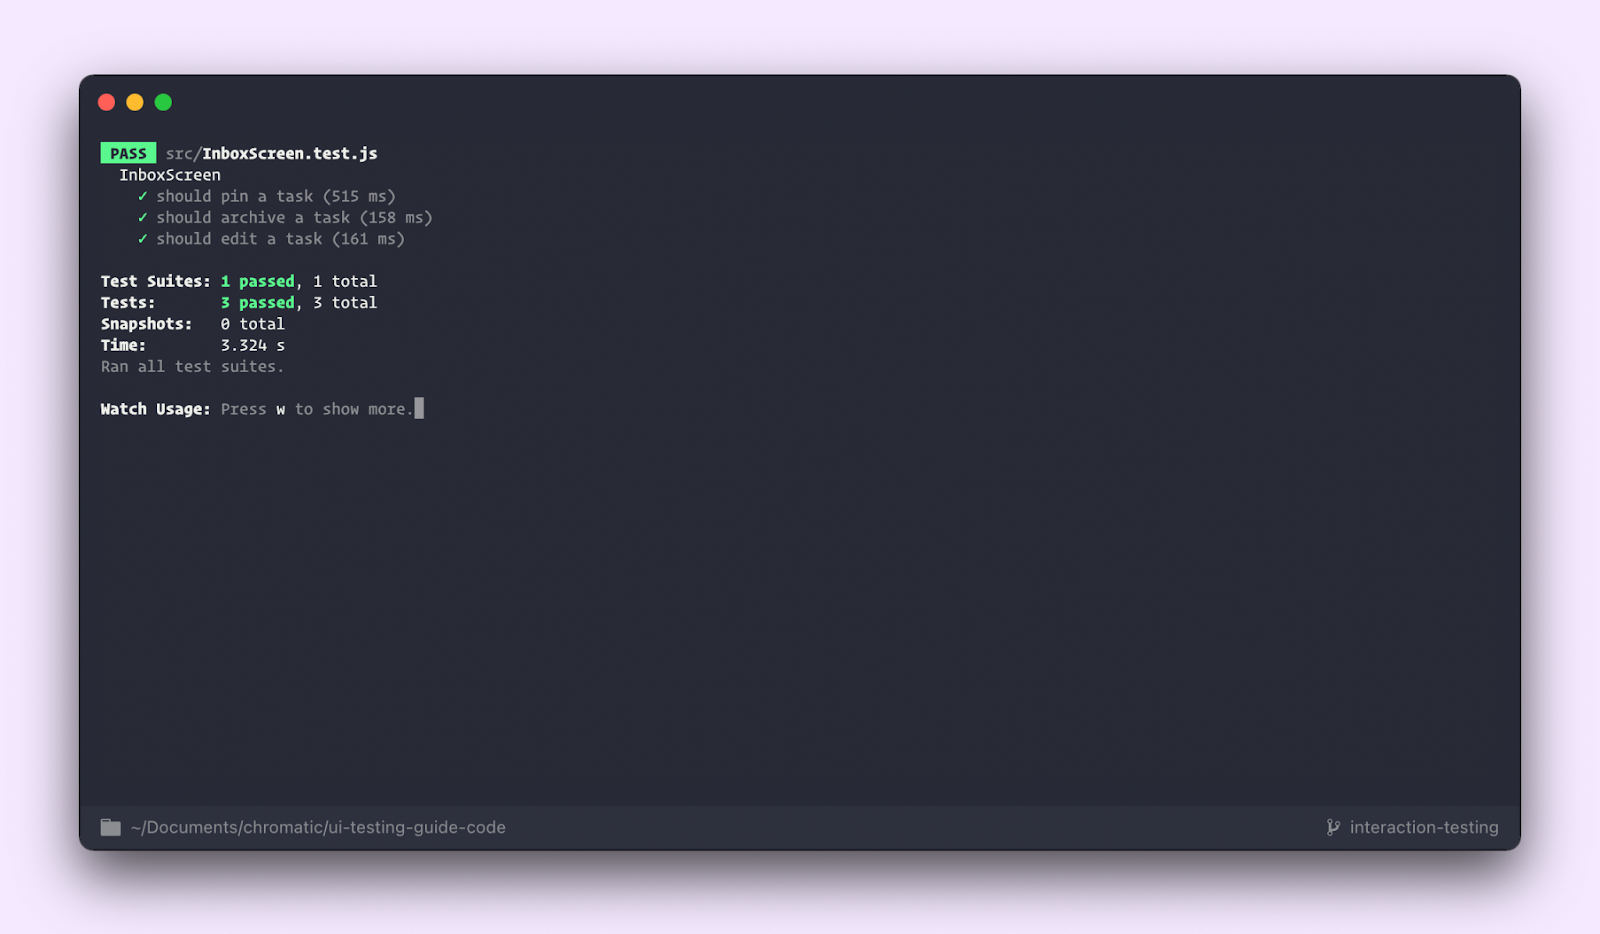
使用相同的模式,我們還可以為封存和編輯場景新增測試。
 it('should archive a task', async () => {
   const { queryByText, getByRole } = render(<Default />);

   await waitFor(() => {
     expect(queryByText('You have no tasks')).not.toBeInTheDocument();
   });

   const task = getByRole('listitem', { name: 'QA dropdown' });
   const archiveCheckbox = within(task).getByRole('checkbox');
   expect(archiveCheckbox.checked).toBe(false);

   fireEvent.click(archiveCheckbox);
   expect(archiveCheckbox.checked).toBe(true);
 });

 it('should edit a task', async () => {
   const { queryByText, getByRole } = render(<Default />);

   await waitFor(() => {
     expect(queryByText('You have no tasks')).not.toBeInTheDocument();
   });

   const task = getByRole('listitem', {
     name: 'Fix bug in input error state',
   });
   const taskInput = within(task).getByRole('textbox');

   const updatedTaskName = 'Fix bug in the textarea error state';

   fireEvent.change(taskInput, {
     target: { value: 'Fix bug in the textarea error state' },
   });
   expect(taskInput.value).toBe(updatedTaskName);
 });
總之,設定程式碼位於 stories 檔案中,而動作和斷言則位於測試檔案中。透過 Testing Library,我們以使用者會使用的方式與 UI 互動。未來,如果組件實作發生變更,則只有在輸出或行為被修改時,測試才會失敗。
Stories 是所有類型測試的起點
組件不是靜態的。使用者可以與 UI 互動並觸發狀態更新。為了驗證這些功能品質,你需要編寫模擬使用者行為的測試。互動測試檢查組件之間的連接,即事件和資料正在流動。以及底層邏輯是否正確。
將測試案例編寫為 stories 意味著你只需要進行一次棘手的設定:隔離組件、模擬它們的依賴項並捕捉它們的用例。然後,所有這些設定都可以匯入到其他測試框架中,從而節省你的時間和精力。
更重要的是,stories 的可移植性也簡化了無障礙測試。當你確保每個使用者都能使用你的 UI 時,你會影響企業財務並滿足法律要求。這是一個雙贏的局面。
但是無障礙功能似乎需要做很多工作。下一篇文章將分解如何在開發和品質保證期間自動化無障礙檢查。這允許你儘早發現違規行為,最終節省你的時間和精力。
你點擊「購買」按鈕,但什麼也沒發生 😰
— Storybook (@storybookjs) 2021 年 7 月 21 日
測試組件功能至關重要,但也很棘手。你必須模擬使用者行為並評估渲染的輸出。
這篇文章向你展示如何使用 @fbjest 和 @TestingLib 來驗證使用者互動:https://#/CViSSIUwyc pic.twitter.com/jGYsuYkz8e